Access premium wholesale laminate flooring from trusted distributors
Discover the authentic wood appearance that durable laminate floors are known for. As wholesale laminate flooring distributors, we stock the latest decor trends, providing exciting and new colours and styles of laminate flooring. Additionally, we offer quality laminate flooring made with the latest global technologies, ensuring the best style and quality. Experience the efficiency of the innovative ‘Drop-lock’ technology, cutting installation time in half, while enjoying our selection of wholesale laminate flooring products with extended warranties, ideal for both residential and commercial installations. As Canada’s trusted laminate flooring distributors, Taiga offers a broad selection of top-quality laminate flooring. We make sure every product is carefully verified, fulfilling our commitment to you and your customers.
Please note that not all laminate flooring products may be available in your region. Contact your local Taiga representative for more information.
*Taiga is a wholesale distribution company. We do not sell directly to the general public. Please contact the nearest retailer for product and pricing information.
Browse Taiga’s wholesale laminate flooring solutions
We are proud to be laminate flooring distributors, providing products from leading brands for your customers’ commercial and residential projects.
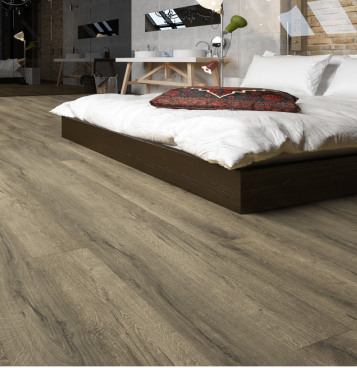
Artfloor Laminate Flooring
Artfloor’s 8mm River and 12mm Privilege laminate flooring lines are renowned for their industry-leading 72-hour water resistance.

HydroXpert Laminate Flooring
HydroXpert 12mm laminate flooring offers 24-hour water resistance and AC4-rated durability, making it ideal for a wide range of spaces.
Already a customer?
Skip to TaigaNow for easy online ordering.
Taiga Warranties
At Taiga, we proudly offer competitive warranties on all our wholesale laminate flooring products. If you have any questions or need assistance with your flooring or accessories, we’re here to help.
Speak with an industry specialist today.
With years of experience in building products, logistics, export, and distribution, our knowledgeable team works closely with you to meet your needs by providing a wide range of value-added services and tailored business solutions.